KEC Foamer Pack-Out Cart
Easily stow your foamer setup and compressor on a hand truck. Build your own foaming station with this easy DIY.
Correct Clean
12/29/20253 min read


Build Your Own DIY Low-Pressure Caustic "KEC Foamer Pack-Out Cart"
If you’ve ever wrestled with tangled hoses, tipped-over bottles, or a sore back from lugging around your compressor, you know the struggle. The “KEC Foamer Pack-Out Cart” is the ultimate solution to streamline your kitchen exhaust cleaning routine.
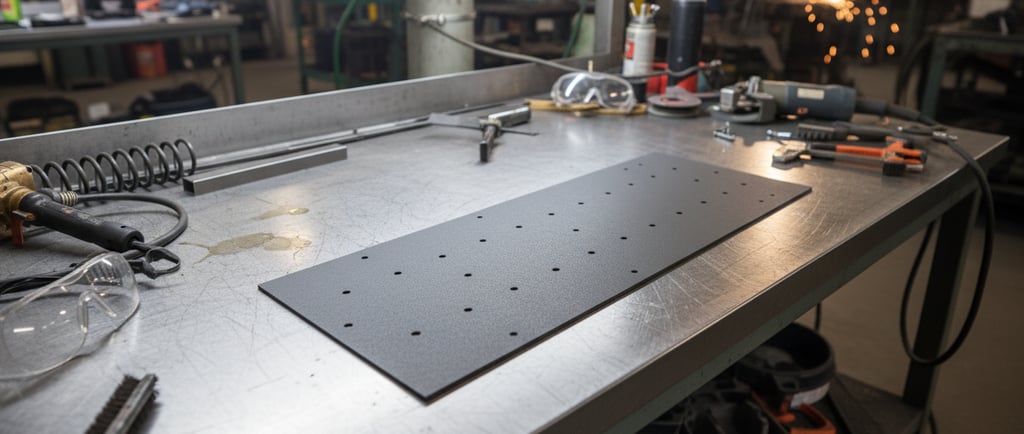
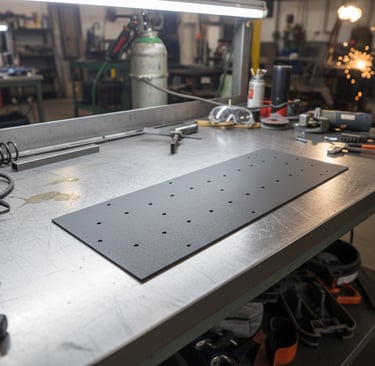
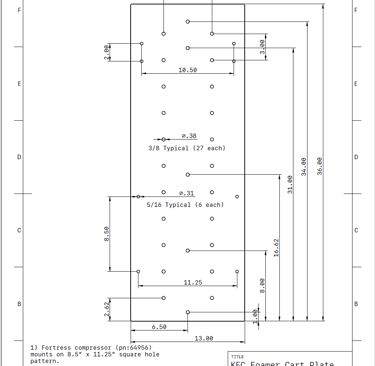
By mounting your Bryan Exhaust Tools Foamer, hose reel, and compressor onto a commonly available hand truck, you turn a 20-minute setup into a 2-minute "plug and play" experience. All you need is the KEC Foamer Pack-Out “Plate”, Bryan Foamer, compressor, hand truck and reel. If you want to make your own plate. Just get a 36”x13” plate of steel, aluminum, or carbon fiber and use these drawings to build your own plate.

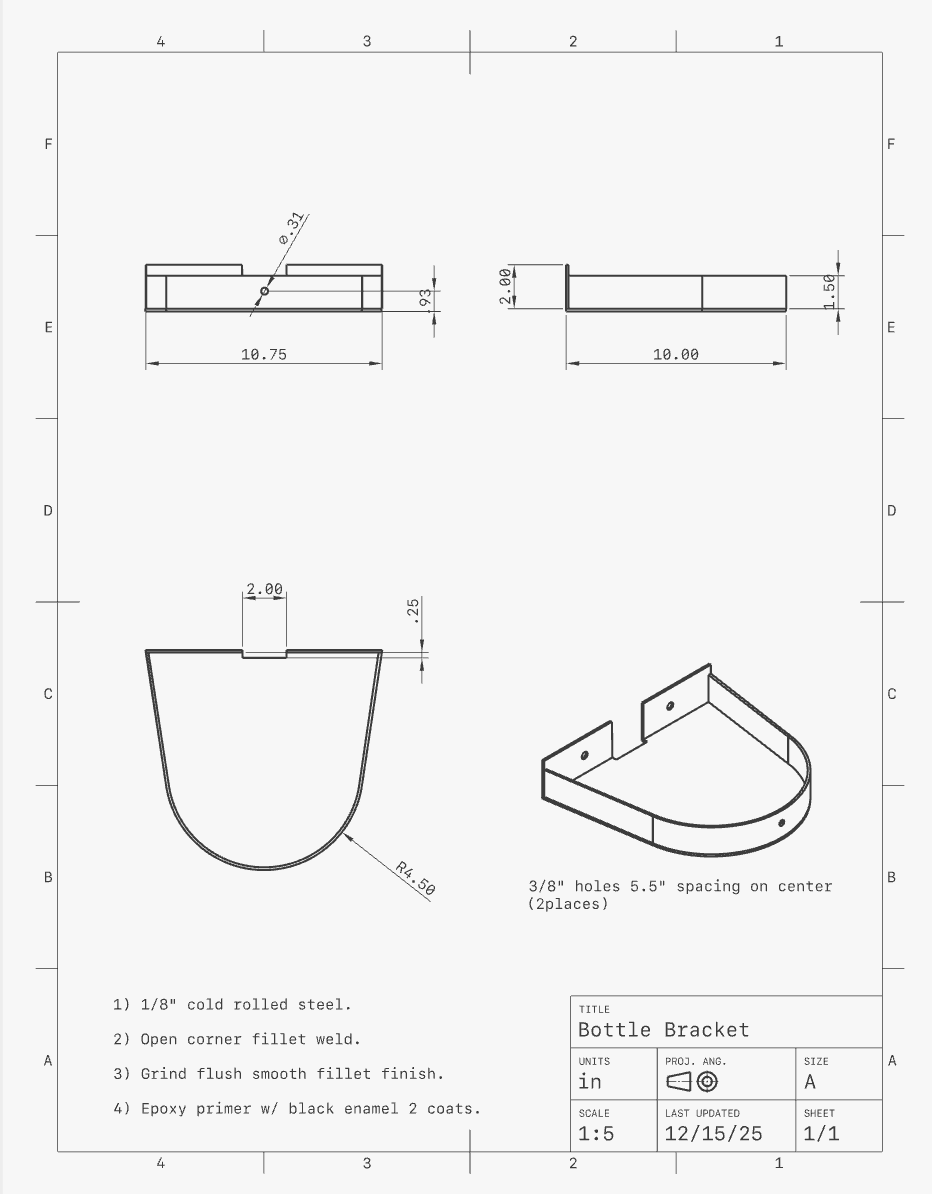
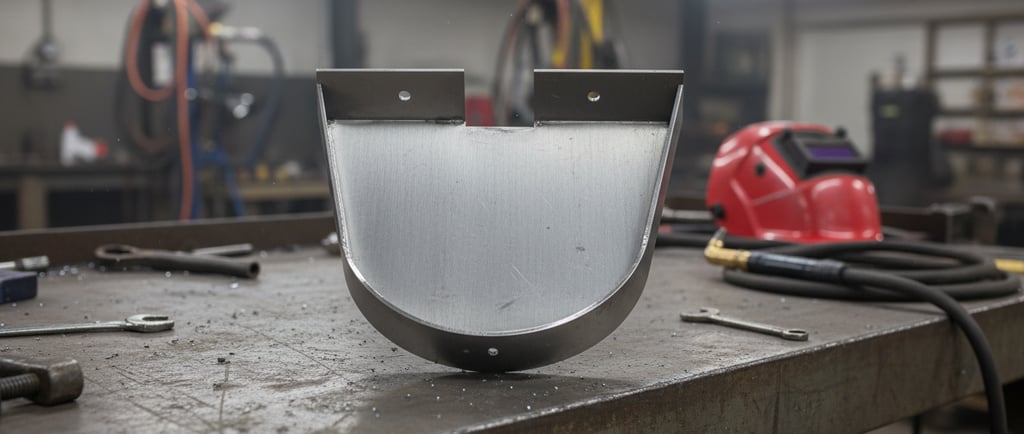
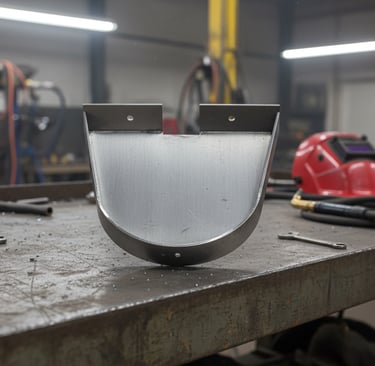
The KEC Foamer Pack-Out "Bottle Bracket" requires some welding skills. If you want to take a crack at it. Here’s a drawing for that too.
Why Build a Custom Cart?
Mobility: Everything rolls on heavy-duty casters and is convertible to stack on as much as you can fit on it.
Efficiency: No more untangling hoses every single job. Instant setup!
Professionalism: A clean, organized setup looks great and protects your equipment.
The Shopping List
Before you start the build, grab these essentials:
Hand Truck - Harbor Freight 2 -1 convertible “Franklin” 800lb hand truck.
Compressor - Harbor Freight Fortress 2 gallon “ultra quiet” 2.1 CFM.
High-Pressure Hose Reel - MEKOH 100’x3/8” hose reel.
Bryan Exhaust Foamer - Bryan foamer unit and additional 50’ hose.
Plumbing & Fittings - ¼” NPT 1” brass extension and 3/8” 24” swivel end 3500 psi. hose whip.
Tools - You need common hand tools and a drill. 1/8”, ¼”, 5/16” and 3/8” drills.
Mounting Plate - Availble to purchase on Send Cut Send. KEC Foamer Cart Mounting Plate - Steel
Step-by-Step Build Guide
1. Prep the Foundation
Place the KEC foamer pack out mounting plate onto the hand truck. The bolt holes form an arrow pointing up. You need to drill the center 5/16” holes through the hand truck spine. Install the 5/16 bolts and use a nut to space out the mounting plate properly. Use lock washers and red Loctite. Bolt the bottle bracket to the lower row of hose reel holes over the hand truck axle.
2. Mount the Hose Reel
Bolt the hose reel in whatever configuration you want. The KEC foamer mounting plate allows universal mounting. You can use dual reels and external compressed air for the jobs that require multiple hoses and guns on deck.
3. Install the Compressor
Remove the rubber feet from the bottom of your compressor. There are 4 #10 metric bolts. You’ll need to go get longer ones to bolt thru the plate. Run to your hardware store and get 3/8” longer bolts. Mount the compressor facing down to the mounting plate and double nut the rubber grommet.
4. Bolt the Plate to the Hand Truck
Bolt the plate to the hand truck.
Pro Tip: Consider spot welding the plate to hand truck. This will add considerable strength and make the overall build a lot easier.
5. Plumbing the System
You’ll need to modify the Bryan apparatus to widen the manifold to clear the hose reel on the sides. Purchase a ¼” NPT 1” brass extension and install on the foamer apparatus. Connect the foamer hose to the reel by either splicing a 3/8 NPT fitting in-line or installing a 24” 3/8” whip. The Bryan foamer comes with hose crimps and crimping too if you chose to just use a brass fitting and splice it in.
The Final Result
Once everything is tightened down, you just need to hook up your power cord. You now have a professional-grade mobile foaming station that you can pack tons of stuff on. Stay tuned as there are more features like bottle cage and class two hitch mount coming soon for you to up-grade your pack-out.